
[ad_1]
Photoshop is a Photographer’s best friend. Other than the camera, Photoshop is the next best thing. Photoshop can be used to correct, enhance or add elements to a photo. Today we will look at how to create a Picture-in-Picture effect in Photoshop.
Creating the photo-in-photo effect with Photoshop will add to the photo making it more interesting. The effect can be further enhanced by adding other effects. Here I would give you a little tip, convert the images you use to Smart objects, this will allow you to easily duplicate the effect with other images without having to start from scratch. Making them smart objects also ensures that the images will be edited non-destructively and will also keep the quality. You may also add text to the image and it could be a postcard or memorabilia for someone special.
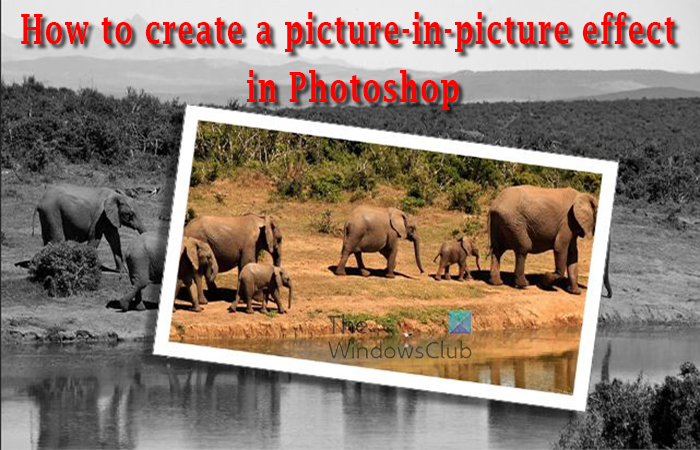
How to create a Picture-in-Picture effect in Photoshop
- Add the image to Photoshop
- Duplicate the image
- Rename duplicate
- Convert the images to Smart objects
- Turn off the top photo layer
- Add Black and White adjustment layer to the background
- Turn on the top photo layer
- Use the rectangle tool
- Draw the shape around the subject of the image
- Place the small photo layer above the shape
- Create a Clipping mask
- Add stroke and drop shadow to the shape
- Rotate the shape
- Bonus
1] Add the image to Photoshop
The first step to creating the picture-in-picture effect is to place the image in Photoshop. One easy easy way to place the image in Photoshop is to locate the image then right click on it and choose Open with then Adobe Photoshop (version). The image will be placed in photoshop as a locked background with the name Background. There are other ways to open an image in Photoshop but the Open with method is used here.
This is the first image that will be used.
2] Duplicate the Image
The next step is to duplicate the image. To duplicate the image, click on the image and press Ctrl + J. the image will be duplicated and the duplicate will go above the original image and it will be named Layer 1. You can also duplicate the image by clicking it and dragging it down to the Create a New layer icon at the bottom of the layers panel. This method will place the image above the original layer and the copy will be named a copy of the original. So if the original is named background, the copy will be named Background copy. The method that was used here was to just select the image and then press Ctrl + J.
3] Rename the duplicate
This step requires you to rename the duplicate. This will help you to identify it in the layers panel. Giving layers meaningful names will help you to work faster and will help you identify the correct layer faster. To rename the layer, double-click on the layer’s name in the layers panel, you will then be able to type the name. Type the name you want then click anywhere in the work area. The descriptive name you can use here is Top Photo or Small Photo.
4] Convert the Images to Smart objects
This step requires that the images be converted to Smart objects. Converting the images to smart objects makes it easier to change the images if you want to do the same effect on other images. You will not have to do the whole thing over, you just edit the smart images. The steps to doing this will be discussed in the Bonus tip at the end and some examples added.
5] Turn off the top image
This step requires you to turn off the visibility for the top image layer. Turning off the visibility of the top layer allows you to work on the bottom layer without obstruction. To turn off the visibility of the layer, go to the layers panel and click on the Eye icon beside the layer.
6] Add Black and White adjustment layer to the background
This step requires you to make the background image black and white. There are a few ways to turn the image black and white. You can use Hue/Saturation, you can add an Adjustment layer. You can use the Gradient map or Desaturation. The method that will be used is adding the Adjustment layer.

To add the Black and white adjustment layer, select the image and click the Create a new fill or adjustment layer icon at the bottom of the layers panel. When the menu pops up click Black and white.

The properties window will pop up so that you can make further adjustments if you want to. You can adjust the individual sliders or you can just press Auto so that the adjustments are automatically done. When you press Auto you will see the image get darker.

This is the image when the adjustment layer was just added.

This is the image when Auto was clicked on the adjustment layer properties window.
You can make more adjustments if you want to, however, this will just be in the background so that should be good enough.
7] Turn on the Top Photo layer
This step will require you to now turn on the layer that you had made invisible. That would be the copy of the background layer. It would have the name that you had assigned to it if you had given it a name. to turn on the layer, go to the layers panel and click the Eye icon beside the image. The image will become visible and cover the background image.
8] Use the Rectangle tool

This step requires the use of the Rectangle tool. To find the rectangle tool go to the left layers panel and select it. The Rectangle tool is in the same group as the Rounded rectangle tool, and Ellipse tools. Ensure that the Rectangular tool is in Shape mode when you select it.
![]()
When you select the Rectangle tool, look at the left of the top menu bar to see if it is in Shape mode, Path mode, or Pixel mode.
Set the shape’s color to black
Set the shape’s fill color to black if it is not already black. The color is not important, however, the black is easier to see when you draw it on the canvas. To change the color to black, look on the top menu bar and click the color swatch, you then choose black from the Color picker.
Turn off the shape’s stroke
Turn off the shape’s stroke, to do this go to the top menu bar and click on the stroke swatch. The color picker will drop down, click the swatch with a line in it, that is the no-color swatch.
9] Draw the shape around the subject of the image

In this step, you will draw the shape around the subject of the image. Ensure that you get it around all that you want to select. The black color of the shape will block out the image, but that will be fixed. If you want to be able to see the image to make sure that it is in the proper place, you can lower the opacity of the shape.

Click on the rectangle and go to the layers pallet and turn down the opacity of the rectangle until you can see the image through it. you can then make adjustments. You can also adjust the size of the rectangle by pressing Ctrl + T to bring up the transform shape around it. You can then adjust the size of the shape. When you have adjusted the shape over to the image, you can then return the opacity of the shape to 100%.
10] Place the small photo layer above the shape
This step requires that you place the small color photo above the shape. You can do this by clicking the photo and dragging it above the shape. You can also do this by clicking on the image and then pressing Ctrl + ]. This will move the layer up. When the image is above the shape, it will block the shape from view.
11] Create a Clipping mask
This step is where you will use the shape and the image to create a clipping mask.

To create the clipping mask go to the top of the layers panel, look on the right tip for the menu button, click the menu button, and then choose Create clipping mask. You can also press Alt + Ctrl + G or right-click on the image and choose Create clipping mask.

This is the clipping mask created, depending on the image you chose, it will look different, since this image is mostly white, it is not showing up yet. However, the other adjustments will bring up the front image.
12] Add stroke and drop shadow to the shape
Add stroke
To add a stroke around the small image, select the shape layer and right-click. When the menu appears, choose Blending options.

The Blending option window will appear, select the word Stroke. Change the stroke color to White (or a color that you want) and make the stroke size bigger. At the Stroke position choose Inside. Choose a size for the stroke that you are comfortable with.
Add a Drop shadow
This next step is to add a drop shadow. With the Blending options window still open, click on the word Drop shadow. You can adjust the shadow’s Angle, Distance, Size, and Spread. While the word Drop shadow is still selected, you can click on the image and click the mouse and hold the left button, and drag in any direction. You will see the Distance and the Angle of the shadow change. Adjust the shadow to what you like and what will fit your image. You can also change the shadow’s opacity to one that is comfortable for you.
13] Rotate the Shape
This step is optional, however, it will add some excitement to your image. You can rotate the shape around the image. to rotate the shape, click on the shape layer then press Ctrl + T. This will bring up the transform box around the shape. When the transform box appears around the shape, hover the cursor outside the edge until the cursor changes to a curved double-ended arrow. You can then click and drag at an angle and the shape will turn.

This is the final image.
14] Bonus tip
The bonus tip has to do with the Smart objects. The images were changed to smart objects. Because they are Smart objects, they can be easily changed out. If you want to use other images for the effect you do not have to start from scratch, with smart objects you can edit the images only and the effects will stay. The new images will fit right in.
Edit images
To edit the images, double-click on the image’s thumbnail.
An information popup will appear telling you what to do to successfully edit. Click ok and then you will be taken to the part to edit the image.
You will see a document open in Photoshop with the image on it, edit or replace the image then save, when you save go back to the original document and you will see the changes. Repeat this step for all the smart objects that you want to change. You can make the rectangle bigger or smaller to fit the new images.
Read: How to make a Silhouette in Photoshop
What is a Smart Object?
A Smart Object is an object in Photoshop or Illustrator that contains all the layer information like a regular object. However, a smart object will not degrade when it is used over and over or when it is resized. The pixels of a smart object cannot be easily edited unless it is rasterized. Any edits done to a smart object can be edited because the smart object will be edited non-destructively. A smart object can be identified by the little box at the lower right edge of the object in the layers panel.
How can I edit the pixels of a smart object in Photoshop?
To edit the pixels of a smart object you will need to rasterize it. to rasterize the smart object just right-click on it in the layers panel then choose Rasterize layer. The smart object will no longer be a smart object and it will lose the little icon at the lower right of the image’s icon in the layers panel.
[ad_2]
Source link
www.thewindowsclub.com