
[ad_1]
If you want to find the GUID of any interface in Windows 11/10, this step-by-step guide will help you go through the process. You can use Registry Editor and Windows PowerShell or Windows Terminal to find GUID in Windows 11s.

GUID is the abbreviation of Globally Unique Identifier that gets assigned to any interface while being stored or installed. That said, each of your installed apps, hardware, network, etc., has a GUID or unique set of numbers that determines which interface is in the process.
How to find GUID in Windows 11 using Registry Editor
To find GUID in Windows 11/10 using Registry Editor, follow these steps:
- Press Win+R to open the Run prompt.
- Type regedit and click the OK button.
- Click on the Yes button.
- Navigate to this path: HKEY_CLASSES_ROOT\Interface
- Expand keys to obtain the GUID.
To learn more about these steps, continue reading.
To get started, you must open Registry Editor on your computer. For that, press Win+R to open the Run prompt. Then, type regedit in the box, click the OK button, and click the Yes button on the UAC prompt.
Once the Registry Editor is visible on your screen, navigate to this path:
HKEY_CLASSES_ROOT\Interface
In the Interface key, you can find numerous sub-keys named like this:
00000000-0000-0000-C000-000000000046
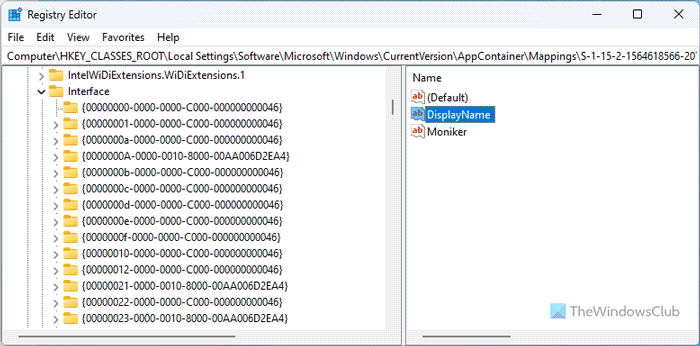
Unfortunately, there is no option to find the GUID of a specific or desired interface. That is why you need to open each sub-key to check the name and find the GUID. However, you can use the Find option, which is available in the Edit menu. In that case, you need to enter the interface name and click the Find Next button.
As the Registry Editor method is pretty time-consuming, you can use Windows PowerShell to do the job faster. However, the only setback is that you can find the GUID of installed apps only.
How to find GUID in Windows 11 using PowerShell
To find GUID in Windows 11 using Windows PowerShell, follow these steps:
- Search for powershell in the Taskbar search box.
- Click on the Run as Administrator option.
- Click on the Yes button.
- Enter this command: Get-WmiObject Win32_Product |Format-Table Name, IdentifyingNumber
To know more about these steps, keep reading.
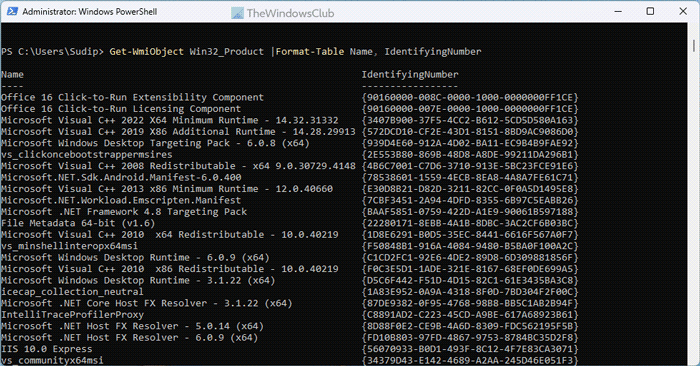
First of all, you need to open the Windows PowerShell with administrator privilege. For that, search for powershell in the Taskbar search box, click on the Run as Administrator option, and click the Yes button on the UAC prompt.
Then, type the following command:
Get-WmiObject Win32_Product |Format-Table Name, IdentifyingNumber
All the applications and GUIDs will be visible on your screen like this:
That’s all! I hope it helped.
Read: How to generate a GUID in Windows 11
How do I find the GUID of a volume in Windows?
To find the GUID of a volume in Windows 11/10, you need to use the Command Prompt. First, use the diskpart and list disk commands to list all the disks. Then, use the select disk [disk-number] command to select a specific disk. Finally, use the uniqueid disk command to find the GUID.
Read: What is GPT Partition or GUID in Windows
How can I find my GUID?
To find the GUID of any interface, you can use the Registry Editor. For that, open the Registry Editor and go to this path: HKEY_CLASSES_ROOT\Interface. However, you can use Windows PowerShell to find the installed app’s GUID. For that, use this command: Get-WmiObject Win32_Product |Format-Table Name, IdentifyingNumber.
Read: Selected GPT formatted disk partition is not of type PARTITION_BASIC_DATA_GUID.
[ad_2]
Source link
www.thewindowsclub.com