
[ad_1]
If the Local Users and Groups option is missing from the Computer Management console on your Windows 11/10 PC, here are some suggestions to help you resolve the issue.
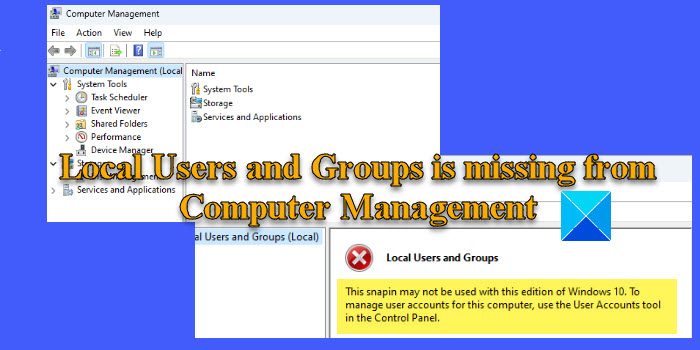
A few users have reported that they are not able to see the Local User and Groups folder under Computer Management on their system. The list of users and groups either disappears in the folder or the folder itself goes missing. Some users also encountered a message while accessing the folder using standard administrative tools. The message reads:
This snapin may not be used with this edition of Windows. To manage user accounts for this computer, use the User Accounts tool in the Control Panel.
If the absence of Local Users and Groups on your Windows 11/10 PC confuses you, read this post to know its possible causes and resolutions.
Local Users and Groups is missing from Computer Management
Local Users and Groups is an advanced tool that allows administrators to manage user accounts and their respective group memberships on a local computer. If Local Users and Groups is not showing in Computer Management on your Windows 11/10 PC, use these solutions to fix the issue:
- Check the Windows edition you’re using.
- Rollback the last update.
- Use Command Prompt.
- Download lusrmgr.exe from GitHub.
Let us see this in detail.
1] Check the Windows edition you’re using
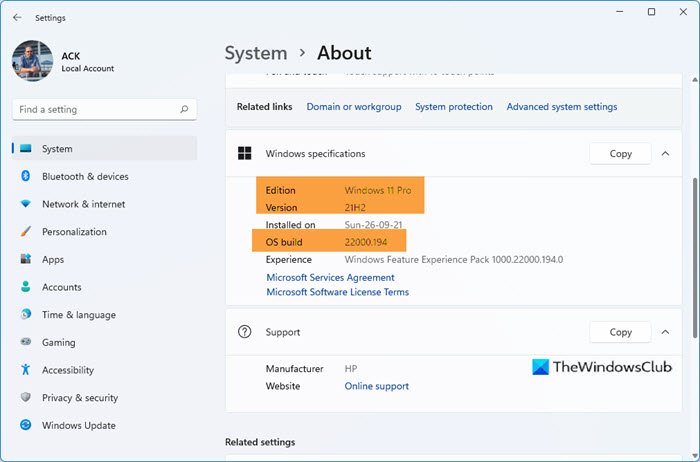
The Local Users and Groups option is available on Windows Pro, Enterprise, and Server editions. Windows 11 Home does not include the tool. So make sure to verify the edition of Windows installed on your system. If you have the Home edition, you might consider upgrading to the Pro edition to get advanced user and group management capabilities.
Go to Settings > System > Activation > Upgrade your edition of Windows. Click on the Open Store button next to the Upgrade in the Microsoft app option to purchase the Pro edition of Windows.
2] Rollback the last update
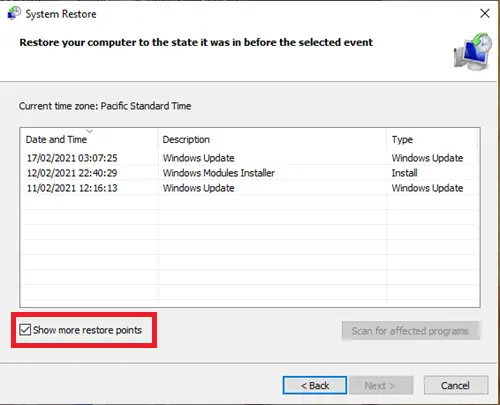
If the users list under the Local Users and Groups option disappeared after installing a particular update, reverting to a previous system state might resolve the issue.
Type System Restore in the Windows Search bar and select Create a restore point option from the list of results that show up.
Click on the System Restore button under the System Protection tab. Then click on the Next button in the System Restore wizard. Check the Show more restore points checkbox and select a restore point prior to the occurrence of the issue. Click on Next, and then on Finish to start the process.
Your system will reboot to apply the changes. If the issue persists, use alternative methods to manage users and groups on your Windows PC, as explained in the following sections.
3] Use Command Prompt
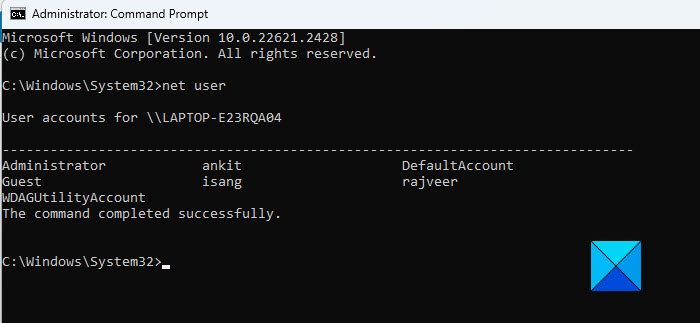
You can use Command Prompt to access and manage local users and groups on a Windows PC.
To view the list of users, type the following command and press Enter:
net user
To create a user, type the following command and press Enter:
net user [username] [password] /add
To add a user to a local group, type the following command and press Enter:
net localgroup [groupname] [username] /add
To delete a user, type the following command and press Enter:
net localgroup [groupname] [username] /delete
To change a user’s password, type the following command and press Enter:
net user [username] [newpassword]
Note: You’ll need administrative privileges to execute the above commands.
4] Download lusrmgr.exe from GitHub
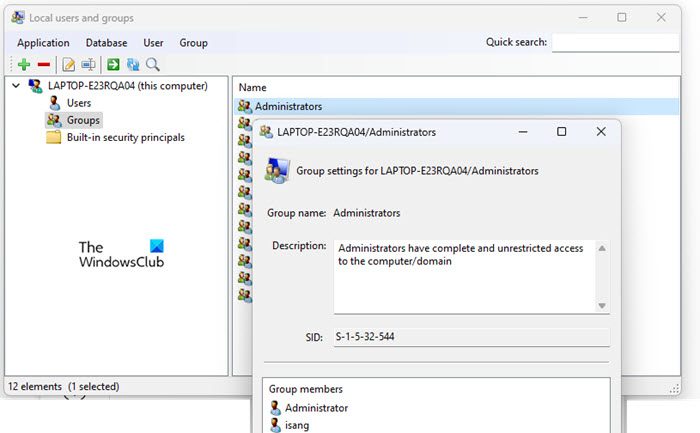
There’s a third-party/open-source project on GitHub that attempts to replicate some of the functionality of the Local Users and Groups tool. You can download this tool on your PC to access local users and groups.
Open your browser and visit the download page of lusrmgr.exe on GitHub. Scroll down to the Download section and click on the Download latest version link. Click on the Yes button in the UAC prompt to launch the tool.
Apart from the above, you may use third-party tools such as Quick User Manager to manage local users on your Windows 11/10 PC.
That’s it! I hope you find this useful.
Read: How to open Local Users and Groups on Windows.
How do I add a local user to computer management?
Press Win+X and select Computer Management from the Power User menu. In the Computer Management window, navigate to System Tool > Local Users and Groups. Click to expand the section. Right-click on the Users folder and select New User. Fill in the required information in the New User window and click on the Create button.
How to get local users with cmd?
Press Win+R and type cmd in the Run dialogue box. Click on OK to open the Command Prompt window. Type net user in the Command Prompt window and press the Enter key. A list of all local user accounts on your computer will be displayed. To find specific information about a particular user, execute the net user command followed by the username.
Read Next: Local Security Policy missing in Windows.

[ad_2]
Source link
www.thewindowsclub.com