
[ad_1]
If you are getting NTOSKRNL.exe Blue Screen error on Windows 11 or Windows 10, here is how you can fix the issue on your PC. This problem mainly occurs when there is some new hardware installed, memory issues, faulty drivers or some system files are corrupted. Either way, you can get rid of the issue with the help of these tips.

What is ntoskrnl.exe?
It is the kernel of the operating system which does and controls almost everything. It is responsible for hardware virtualization, process, and memory management. If you have seen BSOD where there is mention of Ntoskrnl.exe and is related to memory. Apart from this file, there are three more kernel files that work along with ntoskrnl.exe. They are ntkrnlmp.exe, ntkrnlpa.exe and ntkrpamp.exe.
Fix NTOSKRNL.exe BSOD on Windows 11/10
To fix NTOSKRNL.exe BSOD on Windows 11/10, follow these steps:
- Unplug all external devices
- Remove recently installed hardware
- Install driver for the new hardware
- Troubleshoot in Clean Boot State
- Run Windows Memory Diagnostic
- Run CHKDSK
- Run DISM.
To learn more about these steps, continue reading.
1] Unplug all external devices
IT is the first thing you need to do when you are getting the NTOSKRNL.exe BSOD error on your computer. As it is a hardware and driver related issue, you can try solving this issue by unplugging all the external devices. It could be a printer, USB pen drive, external hard drive, Bluetooth adapter, etc. No matter what device is attached to your computer, you need to unplug it and check if it resolves the issue or not.
2] Remove recently installed hardware
If you have recently installed new hardware and the problem started after that, it is recommended to remove that hardware. Let’s assume that you have installed new RAM. If the speed of the old RAM doesn’t match the new RAM, you can find the aforementioned BSOD on your computer. It could be RAM, hard drive, DVD writer, graphics card, etc. Therefore, it is highly recommended to remove the newly installed hardware and check if the problem remains or not.
3] Install driver for the new hardware
In many cases, you might not need to install a driver in order to use newly installed hardware. For example, RAM or Memory doesn’t require you to install a driver. However, if you have installed a graphics card, you must have to install the corresponding driver. Similarly, if you have installed a Wi-Fi adapter, a driver might be required.
If so, you need to install the driver. If a CD is given to you with the hardware, you can find the driver there. On the other hand, you can also download the driver from the official website of the hardware manufacturer.
4] Troubleshoot in Clean Boot State

As mentioned earlier, it is a driver-related issue. If you have recently installed a new driver, it could cause a problem on your Windows 11 or Windows 10 computer. If so, troubleshooting in the Clean Boot State could be a proficient solution for you. Only booting your PC into the Clean Boot State won’t fix the problem. You need to enable or disable drivers at times to get things done. If you want to try, you can read this article to perform a Clean Boot to troubleshoot this BSOD.
5] Run Windows Memory Diagnostic Tool
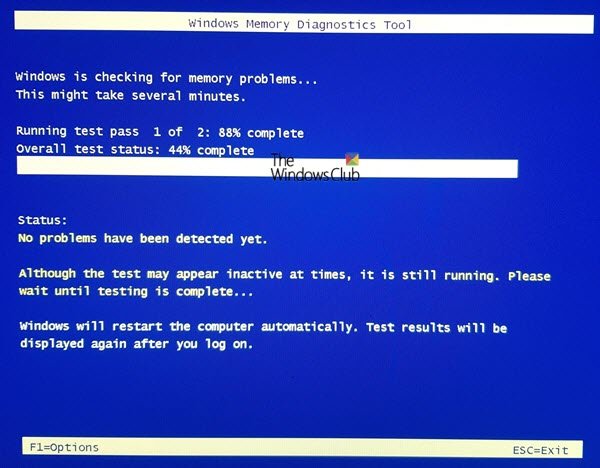
Windows Memory Diagnostic Tool can check for potential issues in your RAM or Memory and fix them automatically. As it is an in-built utility, you do not need to install any third-party app or anything else. However, it takes a few minutes to get things resolved. Therefore, you can follow this guide to learn how to run Windows Memory Diagnostic Tool on Windows 11/10 PC.
Fix: NTOSKRNL.exe high CPU, Memory & Disk usage problem
6] Run CHKDSK
If the Windows Memory Diagnostic Tool doesn’t help, you can check for hard drive issues. The easiest way to do that is by using the CHKDSK utility. In case you don’t know, it is a command-line tool, which finds potential issues related to the hard drive and fixes them on its own. You can follow this detailed guide to learn more about the CHKDSK parameters and how it works.
7] Run DISM
DISM or Deployment Image Servicing and Management helps you fix issues regarding the Windows System Image. If there is any problem with any system file, DISM utility can troubleshoot it within moments. Like the CHKDSK, DISM tool is also an in-built utility, which uses Command Prompt to run on your computer. That is why you can use this guide to learn how to run DISM tool on Windows 11/10 PC.
Read: Kernel ntoskrnl.exe is missing or contains errors, Error code 0xc0000221
Why is ntoskrnl.exe causing BSOD?
Ntoskrnl.exe causes BSOD when there are some issues with the RAM or Memory installed in your computer. If you have two RAMs of different speeds, you might find this issue on your computer. On the other hand, this error might occur due to faulty hardware and corrupted system files as well.
What is the quickest solution to fixing a corrupted ntoskrnl.exe file?
The quickest way to fix the ntoskrnl.exe BSOD error on Windows 11 or Windows 10 is by following the aforementioned solutions. As this error can occur due to different reasons on different computers, you need to follow these solutions one after one and all of them. However, in most cases, running the Windows Memory Diagnostic tool fixes the problem within moments.
That’s all! Hope these guides worked.
Similar Blue Screens:
[ad_2]
Source link
www.thewindowsclub.com