
[ad_1]
This tutorial shows you how to vectorize an image using Illustrator. Many of us just view all images as the same, nothing particularly different. Until we are working with images in a project and the image begins to fall apart, because the project might require a large image, but this image is losing quality. At this point we wonder about the image, and why is it the way it is. Images can be raster or vector.
Raster images are made up of individual pixels that seem incredibly detailed, but they lose quality when enlarged. A vector image is made up of lines, shapes, and mathematical calculations. Vector images usually seem less detailed, but they don’t lose their quality when they are enlarged. Raster Images formats are usually JPEG, GIF, PNG, BMP, and many more. Raster images came first in history, so we are usually converting from raster to vector. Vector image formats are usually SVG, DFX, EPS, and PDF.
How to convert Image to Vector in Illustrator
You may have an old logo or another image for your business, and you want to keep it around, or you want to place it in a large format. This is the perfect scenario for changing it to a vector. Vectors use mathematical calculations and so they are more reliable when enlarged, they will retain quality and clarity. This article will show the steps to convert a raster image to a vector. Note the quality of the raster image will determine how well it will come out and the amount of work that you will have to put in to edit it. the steps involved broadly are:
- Pick Image to Change to Vector
- Decide on Which Image Trace Preset to Use
- Vectorize the Image with Image Trace
- Fine-Tune The Trace Results
- Ungroup Colors
- Make Additional Edits to the Vector Image
- Save the Vector Image
Let’s get into the details.
1] Pick Image to Change to Vector
Try to choose the image with the highest quality to work with. Though you may not be able to pick the image that you want to change, if you have the choice, choose a high-quality image to convert to a vector. The better the quality of the image, the less work you will have to do, and the better the result. Note that you may have to recreate some parts of the image since it may be too low quality to restore. It is best to convert an image about a single subject than to try to convert a landscape.
2] Decide on Which Image Trace Preset to Use
Illustrator has a tool called Image trace that allows you to vectorize your image automatically. This tool comes with a set of modes that allows it to do most of the job automatically.
Here are the options:
- High Fidelity Photo and Low Fidelity Photo – These options produce very detailed and slightly less detailed vector images respectively. They are ideal for photos or complex artworks.
- 3 colors, 6 colors and 16 colors – These presets output vector images with three, six, or sixteen colors. These presets are perfect for logos or artwork with lots of flat colors.
- Shades of Grey – This preset produces a detailed greyscale image.
- Black and White Logo – This preset creates a simple logo with two colors – Black and white.
- Sketched art, Silhouette, Line Art, and Technical Drawing – These presets are best used for specific types of images and create a black and white, mostly line-based drawing.
Open your image in Illustrator, this will activate the Image Trace option at the top. Click the drop-down arrow beside Image trace to see the options. You can try each of the Image Trace options and see which is closest to what you are looking for.
3] Vectorize the Image with Image Trace

Once you have decided on which tracing option is best for you, click the button. Your image will go through the tracing process automatically. When the tracing is finished you should not see any drastic changes to the image unless you chose a tracing that is opposite to the original image. For example, you have a color image, but you chose silhouette, black and white logo, or Shades of Grey. You can try each of the Image Trace options and see which is closest to what you are looking for. After pressing each, you can press Ctrl + Z to undo if you are not satisfied with the result. When you get the result you want you can move on to the next step.

This is the original image without any Image trace.

This is what the image is like when you press High Fidelity Photo. You may not see a lot of changes until you zoom in.

This is the image when you press Low Fidelity Photo.

This is the image after you press Shades of Grey.
![]()
This is the image after you press Black and White Logo.

This is the image after Pressing 3 Colors
The image looks almost the same with some tracing options. However, the traced version will not look stretched when it is enlarged because it has been changed to vector. Remember the tracing result will look different based on the original image. Note also that Illustrator is not a magic wand so terrible rasterized images will not automatically look perfect, you may need to do a lot of work to fix or you may need to redo the image or parts of the image.

This is the image after Pressing Silhouettes.
4] Fine-Tune the Trace Results

After the image is Traced open the Image Trace option from the Window panel and fine-tune the image. Select Mode to switch between Black and White, color and Greyscale. You can drag the color slider left to simplify the vector image or right to add more details.
If you are happy with the changes, you have made and you want to keep these settings for use on other images, you can press the menu button beside presets and save your changes as the new preset.
5] Ungroup Colors

The image has now been grouped into color shapes close to the original raster image. To finish changing from raster to vector, you need to separate the colors so that you can edit them. To do so, click on the image, and click on the Expand button beside the Traced Result button at the top of the window.

The image should look like the picture above showing the paths. When the image is expanded it allows you to break up the color shapes into individual parts and paths.
 To be able to make changes to individual colors you need to ungroup. Expand breaks them up and marks them so they are visible, and ungrouping them makes them individually editable.
6] Make Additional Edits to the Vector Image

The beauty of converting a raster image to a vector is the ability to edit the image. You can delete whatever color groups that you want to. You can select a group of colors by clicking on a shape and going to Select, Same, Fill Color. This will select all groups with the same color as the one selected with the Direct Selection Tool. You can then press Backspace to delete the selected colors. To get to the Direct Selection Tool Press A on the keyboard.
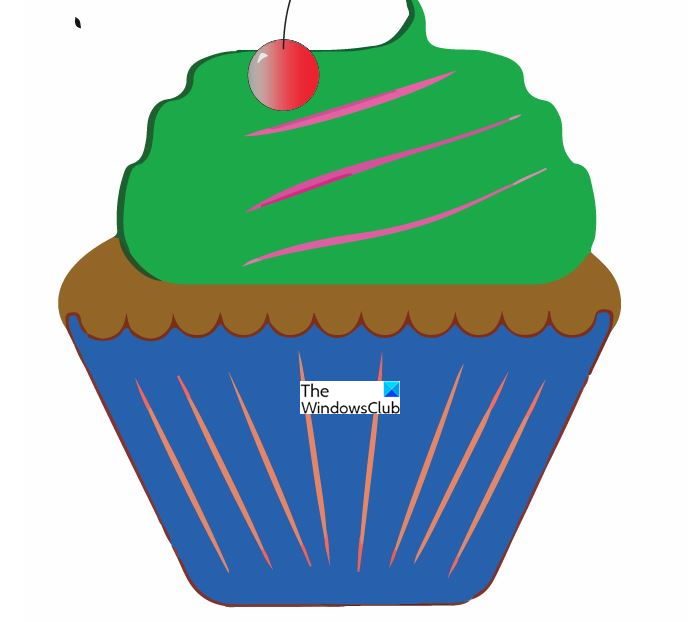
If you want to expand or modify a particular color group, you can do that with the Direct Selection tool. When you have selected a layer, fill in the space or add additional color to the image using the Pen or Brush tool. You will be able to add additional features to the image as you go along, for example, you could add a cherry on top of the cupcake.
7] Saving the Vector Image

This is the last step but not the least. After all that work to change from raster to vector, choosing the correct file format to preserve the quality and keep it as a vector is important. There are a variety of vector image formats to choose between PDF. SVG, AI, and EPS among others. You can use the SVG format because it is widely supported across all design programs and is supported on the web.
Read Adobe Illustrator Tips and Tricks for Beginners
What is the difference between a raster image and a vector image?
A raster image is made up of pixels and the pixels will eventually begin to show as the image is stretched. A vector image is made up of lines, shapes, and mathematical calculations, therefore it will keep its quality even when stretched.
Can any raster image be changed to vector?
Any raster image can be changed to a vector. However, images that are very low quality may need to be reconstructed or recreated. Remaking some images might be much better than trying to change them to vectors.
Are there any places where raster images can be used instead of vector images?
Raster images tend to look better when they are within their dimension. Raster Images tend to be brighter and show very well on screens as long as they are not stretched?
When are vector images better?
Vector images are better in places where there need to be very large images. Raster images can be made to be very large depending on the file format and software, but they will be large files that take up a lot of hard disc space. On the other hand, the vector image can be small but it will stretch to fit a large space. Vector images are great for images that will be small in one setting but may be needed to be very large in another setting, for example, a company’s logo.
[ad_2]
Source link
www.thewindowsclub.com