
[ad_1]
Photoshop is one of the best graphic software available both for professionals and hobbyists. Photoshop is used for photo manipulation and image correction. This article will show you how to place two images in one creating one uniquely beautiful image, this is called Double exposure. Knowing how to do Double Exposure effect in Photoshop can bring out the best of both images into one. It can be used to tell a story or make one subject seem to be imagining another.

The name double exposure comes from the method that was used to create the effect. Before the advent of graphic software. Photographers would create double exposure by running the same film through the camera and seeing what would happen. There were other methods used, but this was one way that it was done. The double exposure effect is sometimes called the ghost effect as one image would look like a ghost in the other.
How to do Double Exposure effect in Photoshop
The double exposure effect in Photoshop is an interesting image manipulation effect and can bring interest to otherwise boring photos. Knowing how to do double exposure effect in Photoshop can make your social media images more interesting. This article will show you how to turn two images into one beautiful double exposure in Photoshop.
- Open and prepare Photoshop
- Place the images in Photoshop
- Prepare the images
- Change the opacity and blend mode of the top image
- Create Layer mask
- Use the brush to make selected parts more visible
- Add a gradient fill
- Copy layer mask
1] Open and prepare Photoshop
To open Photoshop, locate its icon, double click it and it will open. You would then create a new document by going to File then New or pressing Ctrl + N. The New document options window will open. Here you choose the options that you want for your document. When you are satisfied with the options chosen, click Ok to commit the options and open a blank document canvas on which to work.
2] Place the images in Photoshop
With the new document created, you can now place the images in Photoshop. Since you have a new document created, you can simply click and drag both images onto the blank canvas in Photoshop.
3] Prepare the images
With the images now in Photoshop you will need to prepare them. Place the image that you want as the base image at the bottom and place the other image on top. You can simply go to the layers panel then click and drag the thumbnails up or down to reposition them. You may also need to resize the images as well. If your image has a background, you can choose to remove the background.
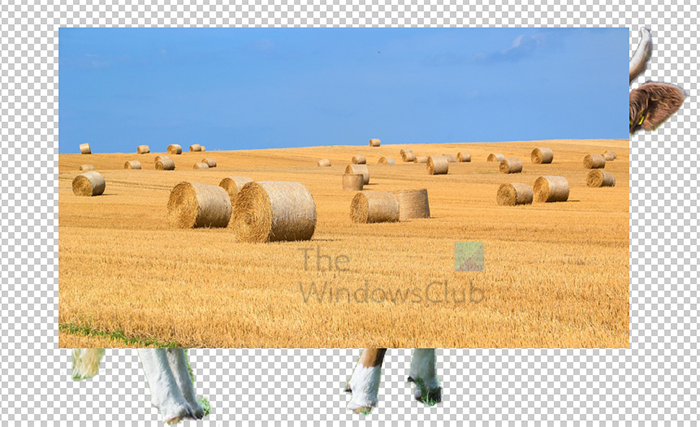
These are the images on the canvas, you will notice that you cannot see all of the image that is at the bottom. If you want the double exposure effect to fill all of the lower image, you should completely cover the bottom image.
4] Change the opacity and blend mode of the top image
Read: How to make Background Transparent in Photoshop
You will notice that you are unable to see the image below, however, this step will help with that. You will change the opacity and the blend mode of the top image.
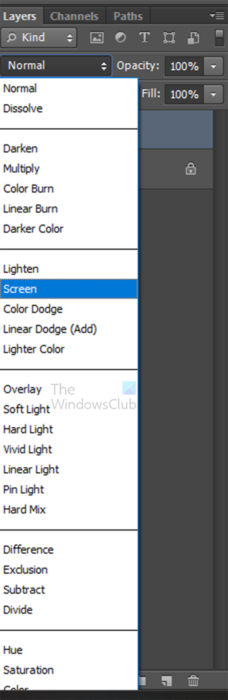
Select the top image and go to the layers panel and go to where you see Normal, click the arrow, and select Screen. You can then lower the Opacity of the top image. lower the opacity to a value that is comfortable for you. You can always lower or increase the opacity later.
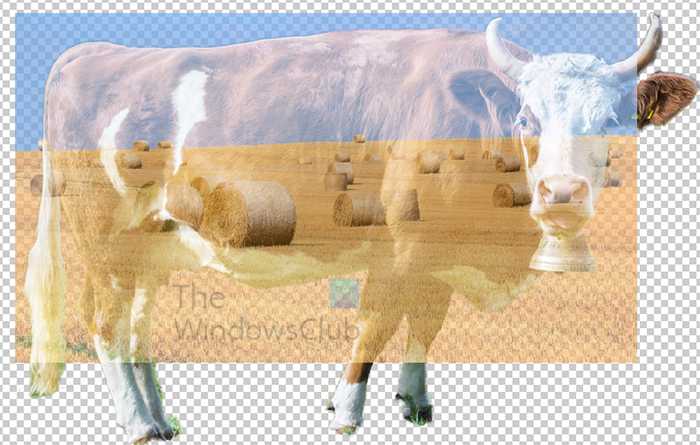
This is the image where the top image has a Blend mode of Screen and Opacity of 77%.
5] Create Layer mask
As you notice, the top image covers parts of the lower mage that you may not want it to cover, you can control the top image by creating a Layer mask. The Layer mask will allow you to show just the parts of the image that you want.
To create the layer mask, make a selection of the bottom image. you can use the quick selection tool to make the selection around the image. When the selection is created, click on the top layer in the layers panel. You will then go to the bottom of the layers panel and click the Add Layer Mask icon while holding Alt. This will cause the layer mask to be added beside the icon of the top image. If by chance you created the layer mask beside the bottom image, you can always select it and drag it up beside the layer for the top image.
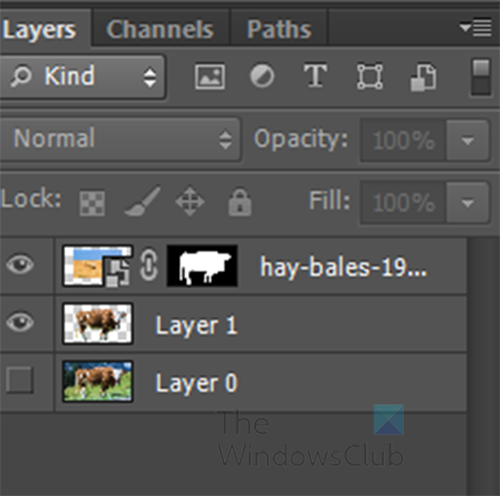
This is what the layers panel should look like when the layer mask is created.
This is what your images will look like when the layer mask is added. Your images may be slightly different depending on the image you used and how big you made the top image.
6] Use the brush to make selected parts more visible
You will notice that the image at the bottom is a bit faded. If you want to make some parts more visible you can use the Brush tool to brush over the areas that you want to show up more. For this article, the brush will be used on the face area.

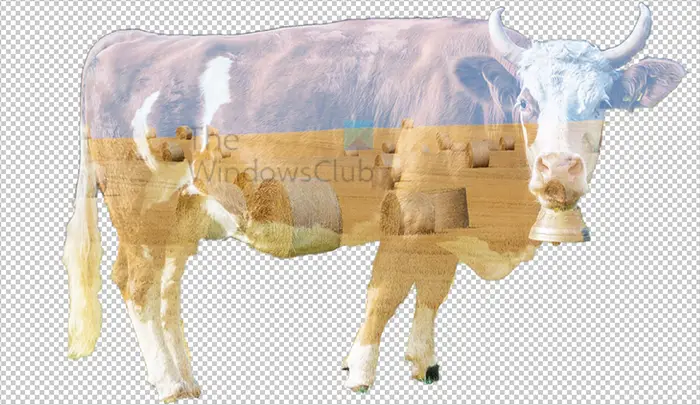
This is the image with the face area of the cow brushed over, you will notice that the face is more visible. You may have to keep brushing if you need it to be brighter. Just brush and release the mouse button then brush the same areas again, this will make them get brighter. Your image will be as bright as you want it to be.
7] Add a gradient fill
To make the effect stand out more, you can add a gradient fill. Select the top layer then go to the bottom of the layers panel.
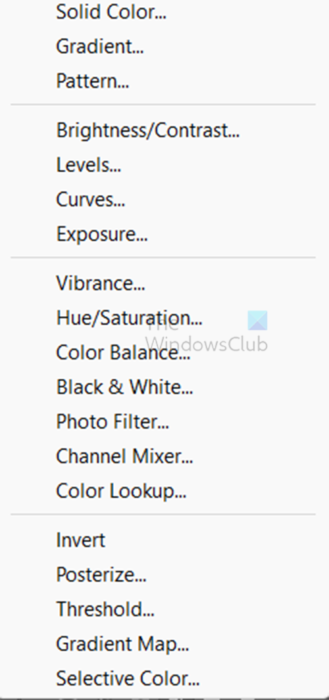
Click the Create new fill or adjustment layer icon. When the menu appears, select Gradient.
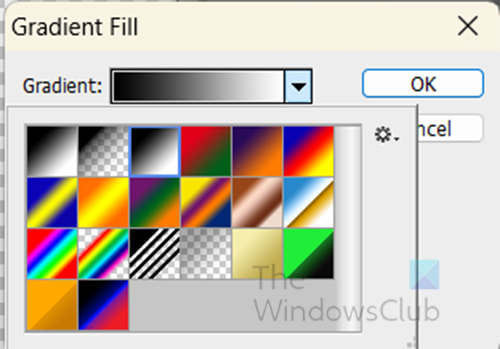
The Gradient fill options window will appear.
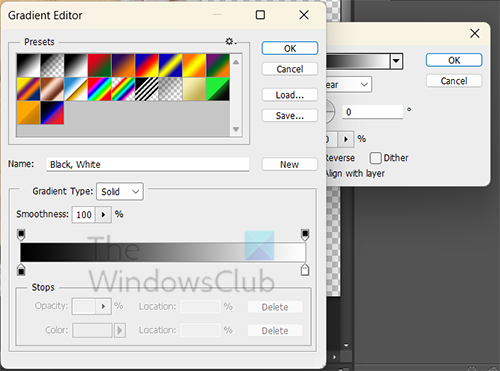
Click on the gradient color to bring up the gradient picker. From the gradient picker select the Violet Orange gradient. When you have selected the Violet Orange gradient or any gradient that you think fits your project, move the left gradient Color stop to the middle (50), and move the color Midpoint to 42. When you are finished click OK. You will be taken back to the Gradient fill options window. Set the Angle to 0. These settings are going to be dependent on your image so move the color stop and the midpoint to the values that fits your need. You may have the gradient hiding the images, not to worry. Go to the layers panel and click on the newly created Gradient fill layer change the Blend mode to Overlay and the Opacity 60%.
8] Copy layer mask
You may notice that your gradient color is spilling outside of the bottom image. you can control this by placing a copy of the layer mask onto the newly created Gradient fill layer. Simply select the layer mask, hold Alt, and drag to the Gradient fill layer.
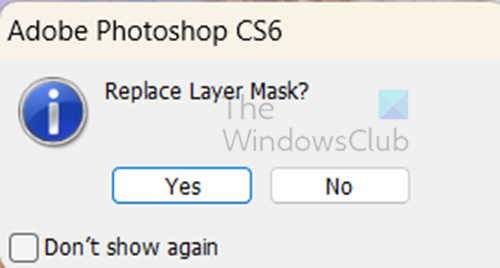
You may be asked if you want to replace the layer mask, click Yes. You will see that the gradient is kept within the image.
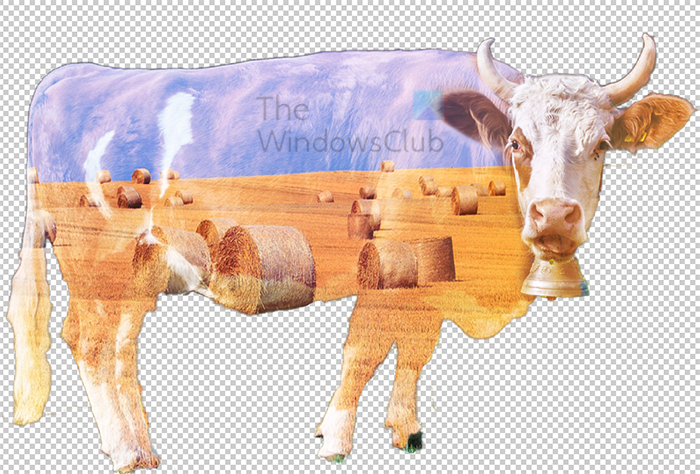
This is the completed image with the double exposure effect.
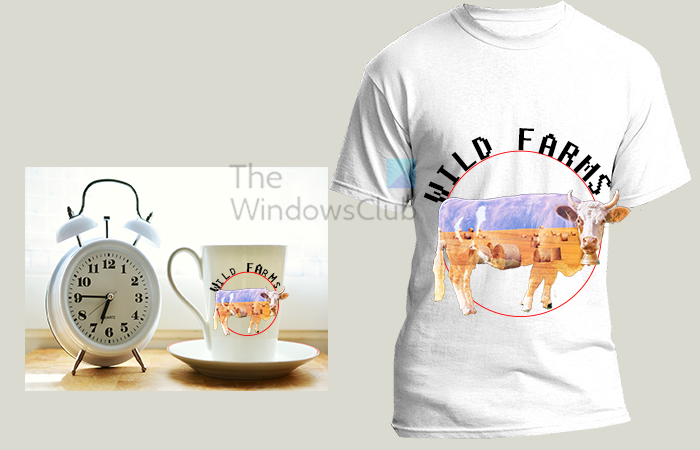
You can use the double exposure effect on items for your personal use or for branded items for clients or your company.
Read: Can’t save as JPEG or JPG in Photoshop
How do I blend images in Photoshop?
To blend images in Photoshop you can use the Auto-Blend feature. To use the auto blend feature in Photoshop, open Photoshop and then place your images in Photoshop. You can then arrange the images how you want them to blend. You can stack them on each other or allow them to overlay each other in your chosen method. When the images are arranged the way you want, go to the top menu bar and select Edit then Auto-Blend Layers. A menu will pop up asking which method you want to use. You can choose Panorama or Stack images. If you choose Panorama you will have to make sure that images are not stacked. If you choose Stacked images, the images can be stacked, or in other arrangements, Photoshop will blend the sections that are touching.
What is double exposure?
Double exposure is where two images are combined to make one image. this is true in using a camera or if you use graphic software to do a double exposure effect. With a camera, you would insert the same film and the second exposure would add more elements to the first elements that were already there. This is sometimes called a ghost. If you use graphic software you put two images together and use layer masks and gradients to create the double exposure effect.
[ad_2]
Source link
www.thewindowsclub.com