
[ad_1]
There are many features hidden in Microsoft Outlook that is hidden from view on the menu bar or standard toolbar. You can gain access to other Microsoft Office features by selecting the customized Ribbon settings in the Options settings; an example of one of these features is the Crop to Shape feature. The Crop to Shape feature changes the shape of the drawing, preserving all its formatting. In Outlook, the Crop to Shape feature is a part of the crop feature, but what if you want it on the Home tab or the Insert tab, where you can get access to it easily without going to the Picture Format tab to use it? In this tutorial, we will explain how to enable the Crop to Shape button in Outlook.
How to enable the Crop to Shape button In Outlook

- Launch Outlook.
- Click the New Email button in Outlook.
- Right-click the ribbon and select Customized Ribbon.
- An Outlook Options dialog box will open.
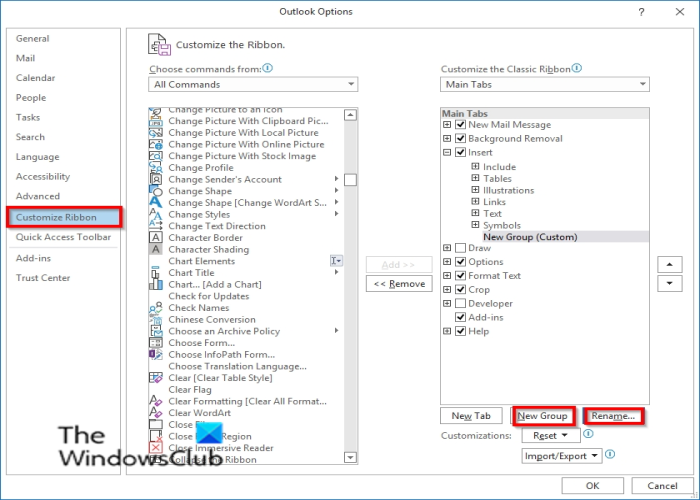
- Now on the Customize Ribbon tab, click the tab that you want the Crop to Shape button to be, then click the New Group button.
- The New Group ( Custom) will appear under the selected tab.
- Rename the group by clicking the Rename button.
- A Rename dialog box will open. Rename the Group.

- On the right click, the list box of Choose Commands from and select All Commands.
- Then scroll down and select the Crop to Shape button.
- Then click the Add button.
The Crop to Shape feature will go under the new group, then click OK.
How to use the Crop to Shape button In Outlook
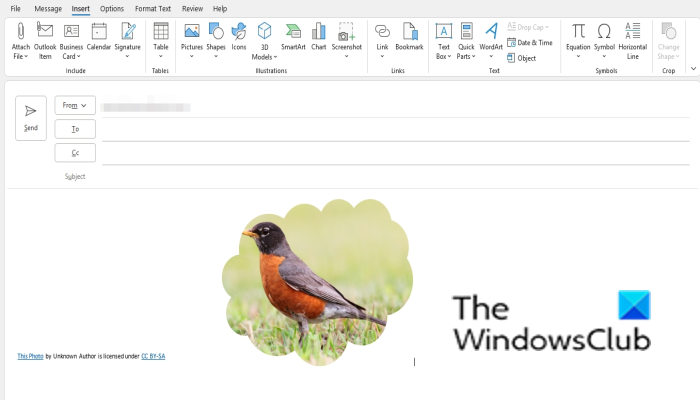
Click the Insert tab and click the Picture button; you can choose the picture from File, Stock Images, and Online Picture.
Now go to the tab where you choose to place the Crop to Shape button. In this tutorial, we place the Crop to Shape under the Insert tab.

Click the Crop to Shape button, then select a shape from the menu.
")
Any shape you have chosen, the picture will turn to that shape.
Where is the crop option in Outlook?
The Crop feature helps users to remove unwanted areas. Follow the steps below to locate the Crop option in Microsoft Outlook.
- Select the picture.
- Click the Picture Format tab.
- Click the Crop button and select Crop from the drop-down menu.
- Crop the image.
Which option is available in crop page?
The options available in the Crop feature on Outlook are:
- Crop: Crop your picture to remove any unwanted areas.
- Crop to Shape: Convert images to shape.
- Aspect to Ratio: The ratio of the width to the height of the image.
- Fill: Resize the area so that the entire area of the picture is filled while maintaining the original aspect ratio. Any area that falls out of the picture area will be cropped while maintaining the original aspect.
- Fit: Resize the entire picture display inside the picture area.
How do you crop?
- After clicking the Crop button, you will see some angles will appear on the end.
- Place the cursor on the angle and drag it down to remove the area of the picture you do not want.
- Some areas from the picture will disappear
We hope this tutorial helps you understand how to enable the Crop to Shape button in Outlook.
[ad_2]
Source link
www.thewindowsclub.com